FAQ
How to adjust stylus?
date:2016-08-02 source:Dailyaid
1. Instrument to repair
Toothpick, Phillips screwdriver, tweezer, flathead screwdriver
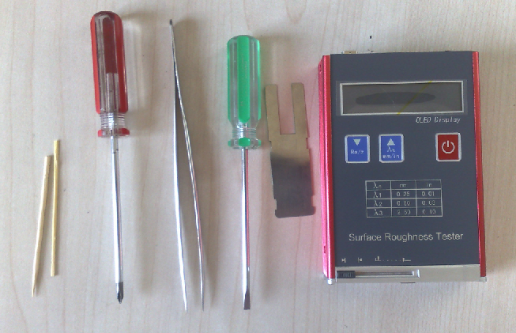
2. Open the stylus protection door as the picture shows
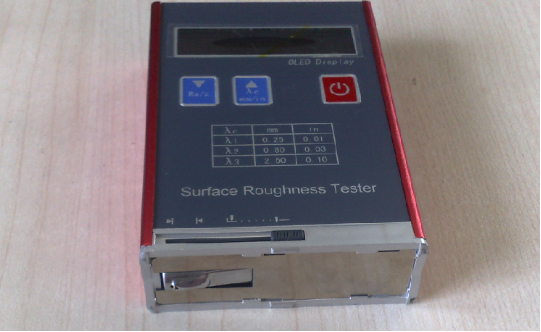
3. Pry the bottom up with toothpick or tweezer
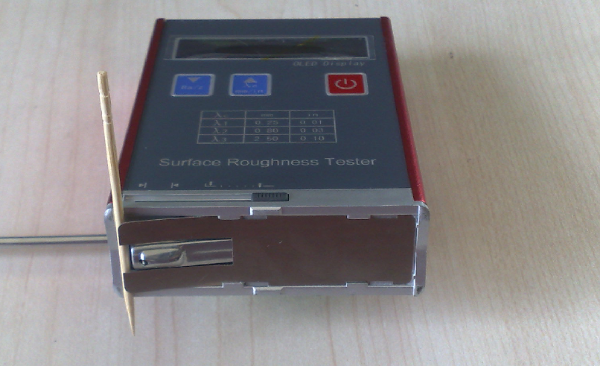
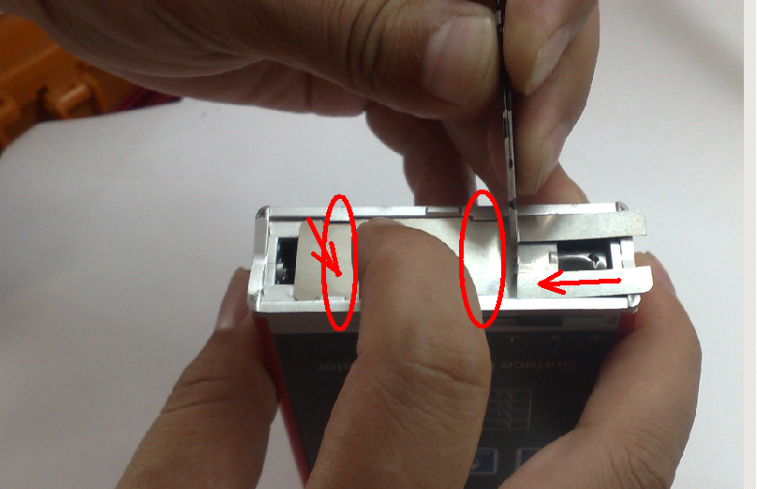
4. Push the underneath of base plate slightly, make the base plate move to the initial place
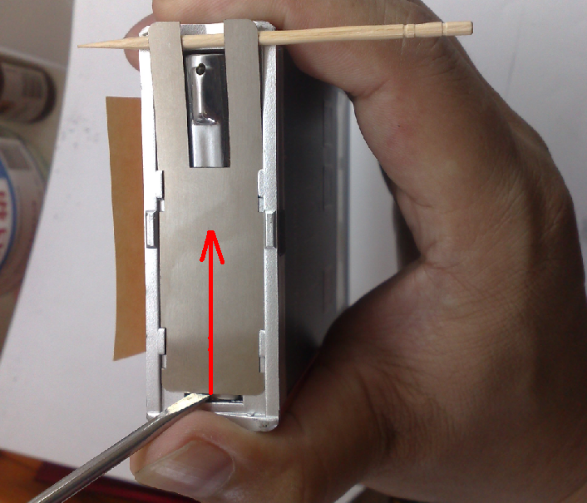
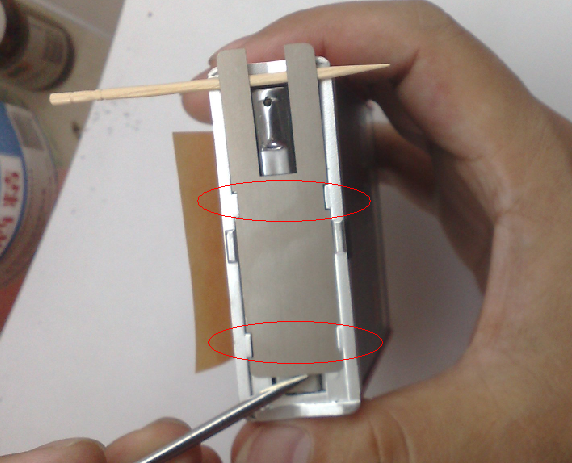
5. Take off the base plate, close the stylus protection door, expose the adjustment screw
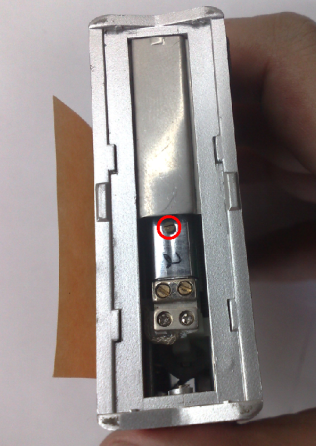
6. Turn the adjusting screw counterclockwise with screwdriver, don’t adjust too much every time, max 45 degree. Then open the stylus protection door, inspect the value location, the result is to Let stylus expose over the highest point 0.2mm-0.5mm;
Attention:
Stylus can’t be exposed more than 0.5mm, otherwise the stylus may be hurt.
Counterclockwise adjusted, the stylus is exposed
Clockwise adjustment, the stylus is retracted.
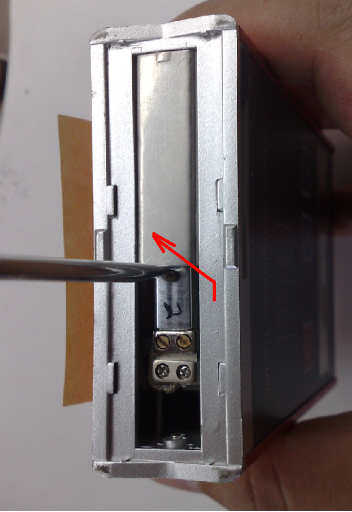
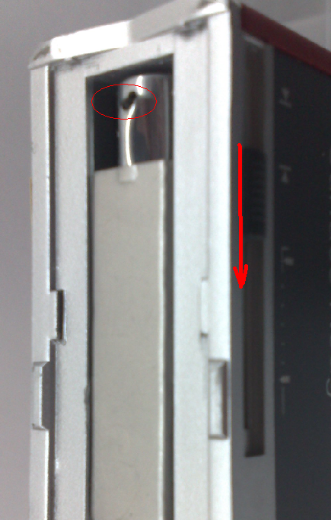
7. After adjusting the stylus to proper location, we have to do some calibration to make sure the precision of value. In the off state, push the start button and power button to turn on the tool, enter calibration, specific process is following the user manual.
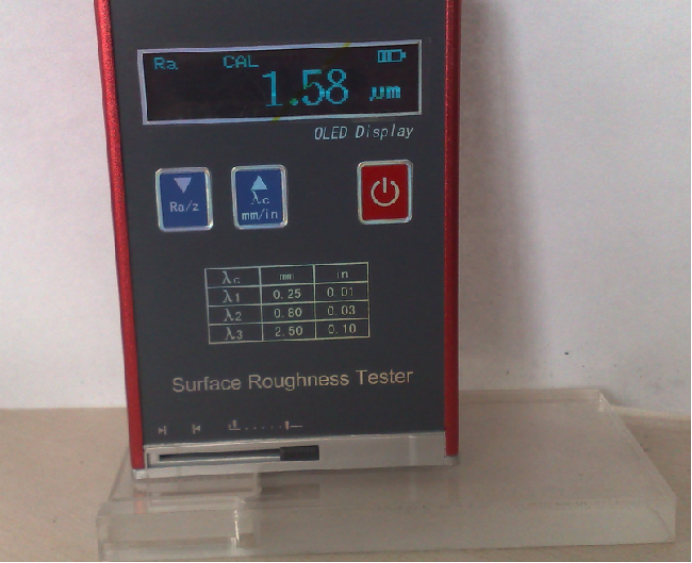
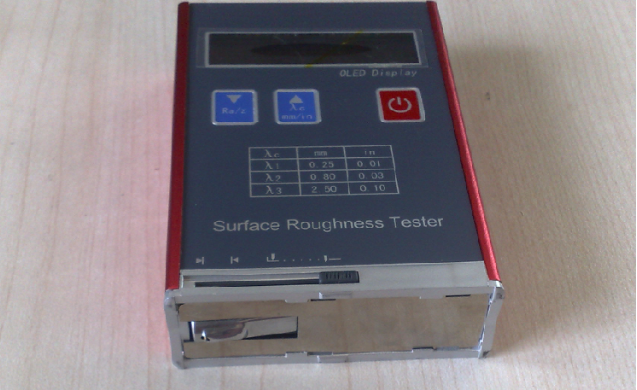
8. After calibration, if the value is correct, base plate is mounted to the appropriate location. The bottom slot is placed in a prominent position of the stand, press down firmly by hand to the left while pushing the floor with tweezers, put it into the bracket slot. Picture is as below.
Toothpick, Phillips screwdriver, tweezer, flathead screwdriver

2. Open the stylus protection door as the picture shows

3. Pry the bottom up with toothpick or tweezer

4. Push the underneath of base plate slightly, make the base plate move to the initial place


5. Take off the base plate, close the stylus protection door, expose the adjustment screw

6. Turn the adjusting screw counterclockwise with screwdriver, don’t adjust too much every time, max 45 degree. Then open the stylus protection door, inspect the value location, the result is to Let stylus expose over the highest point 0.2mm-0.5mm;
Attention:
Stylus can’t be exposed more than 0.5mm, otherwise the stylus may be hurt.
Counterclockwise adjusted, the stylus is exposed
Clockwise adjustment, the stylus is retracted.


7. After adjusting the stylus to proper location, we have to do some calibration to make sure the precision of value. In the off state, push the start button and power button to turn on the tool, enter calibration, specific process is following the user manual.

8. After calibration, if the value is correct, base plate is mounted to the appropriate location. The bottom slot is placed in a prominent position of the stand, press down firmly by hand to the left while pushing the floor with tweezers, put it into the bracket slot. Picture is as below.


- last text:Surface Roughness Ra, Rz, Ry
- next text:How to change the battery of roughness tester?
All Products
- Surface Roughness Tester (3)
- Coating Thickness Gauge (2)
- Ultrasonic Flaw Detector (7)
- Ultrasonic Thickness Gauge (4)
- Leeb Hardness Tester (6)
- Desktop Hardness Tester (7)
- Vibration Meter (3)
- Other Products (9)

-
Beijing Dailyaid Measuring & Control Ltd.
Address: Room 709 #3 building, Zijinshuma yuan, Zhongguancun, Haidian district, Beijing, China. 100190
Tel: +86-10-5979 6778 ext 207
Fax: +86-10-6266 2785
Email: export2@dailyaid.com.cn
Website: www.dailyaid.net


